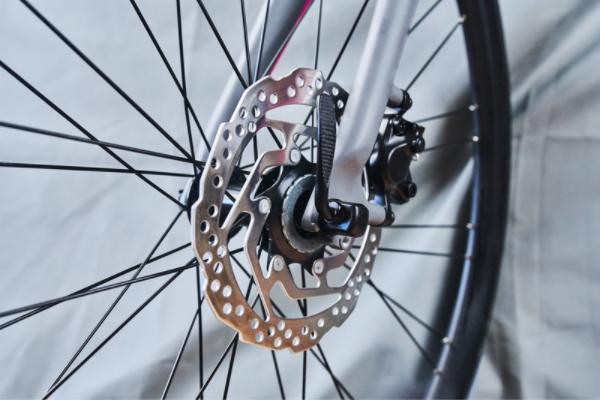
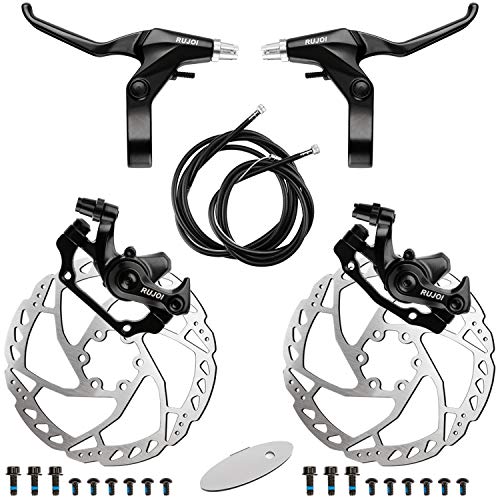
If you’ve ever used tire sealant or chain lube on your road bike, then you’ve likely contaminated your bike’s brakes without even realizing it.
When the disk brakes are dirty, the bicycle tends to make a constant squealing noise which is an indication of failing brakes. Contaminated disk brakes also deteriorate quicker.
You can clean the disk brake on your bike in 4 easy steps. By the end of this read, you’ll also know how to keep your brakes tidy in the future.
Once cleaned, you’ll find your bike’s brakes to be more silent, smooth, and effective.
What Causes Disk Brake Contamination?
Squeaky brakes are likely the result of contaminated disk brakes. This contamination is caused by oil, degreasers, sealants, and anything else oil-based that may have gotten on the pads.
When the pads swell, they lose their grip on the rotor. The resulting vibration leads to squealing.
When they’re badly contaminated, replacement is necessary. However, in most cases, you can clean them up.
Read How To Clean a Road Bike After Riding in the Rain
How to Clean Disk Brakes on a Road Bike
Read on for how to clean disk brakes on a road bike.
1. Remove Disk Brakes
To start cleaning your disk brakes, you’ll first need to remove the brakes from the rest of the bike. You can remove the brakes by following these simple steps:
Step One: Remove the Pads from the Caliber
You’ll also want to remove the wheels, so the rotors are away from the caliber as well.
Make sure you’re wearing nitrile gloves throughout this entire process, so you don’t transfer oil onto the brakes.
Step Two: Remove Retaining Pin
- For cotter pin designs, bend the end of the pin with a pair of pliers. Once straightened out, you can easily remove the pin from the caliber.
- For pin clips, simply pull it out.
- If the road bike has springs, they’ll be removed with the pads.
2. Inspect Brake Pads
Experts recommend replacing your brake pad if it has less than 1.5mm of padding left. Replacing it can give you a much smoother performance without wasting your time cleaning it.
However, if the brake pad still has plenty of life, you should proceed to clean it.
How to Replace Disk Brakes
If your disk brake pads are so worn that you can see the metal, now’s the time to replace them. Delays can cause damage to your rotors and ruin your bike.
Step One
Push the old pads into the caliper using a flathead screwdriver.
Step Two
Center the new disk, so the rotor is centered parallel to the caliper body.
Step Three
Install the new pads with the retention pins and reinstall the wheel.
Read How to Remove Bike Cranks?
3. Spray Brakes
The most common cleaning solution to clean disk brakes is isopropyl alcohol.
Experts recommend using alcohol over commercial cleaning products because most of them create a sealant over the brake, making it harder to clean in the long run.
If you choose to use a commercial product, research the bike’s manufacturer and find the cleaner specific to your road bike.
Commercial Cleaners
A mild soap and water are also great for cleaning dirty disk brakes, as this tends to not leave contamination on the rotors.
Step One
First, lay the brakes down onto a flat surface, then generously spray with your desired cleaner.
Step Two
Next, you’ll want to sand down the surface of the brake pads using medium coarse sandpaper. This is important for creating that rustic surface that induces friction.
Step Three
Lastly, you’ll want to clean your brake pad’s caliper. You can clean this by spraying it with isopropyl alcohol and giving it a gentle wipe with a cloth rag. This is a great step for preventative maintenance.
Read How to Remove Rust from Bikes
4. Bleed Brakes
While it’s not necessary for regular maintenance, bleeding your bike’s brakes replenishes the oil in your brake line. Putting fresh oil in your brake line will give you much better braking power and rids the line of pesky air bubbles.
You’ll definitely need to research your bike manufacturer for specifics on how to bleed your bike’s brakes. However, the process can be simplified.
Most bike stores sell bleeding kits which makes this entire process less intimidating.
Step One: Insert Bleed Block
Bleed blocks fit between the pistons of your brake caliper and prevent them from moving during the process.
They’re usually made of a noncompressible material such as metal, rubber, or thick plastic.
You could potentially make your own if your kit doesn’t include one.
Step Two: Thread the Bleed Cup into the Bleed Port
In a clockwise motion, thread the bleed cup into the bleed port. Be careful not to overtighten the cup, as this can cause stripping.
Step Three: Open the Bleed Valve
Attach the bleed hose to the bleed syringe and fill it with oil. You can get air bubbles out by inverting the syringe and squeezing bubbles out.
Step Four: Push Fluid into the Line
Turning counterclockwise a quarter of the way, push mineral oil into the brake line using the syringe.
Step Five: Pump Half the Fluid
Keep pushing fluid into the line until it’s halfway gone. Then close the valve and remove the bleed hose.
Following these steps will increase the effectiveness of your brakes.
Check out, 8 Steps To Clean Your Bike
Disk Brake Maintenance
Oil can be so easily transferred onto your rotors and pads from careless mistakes such as improper handling, or not using a drip lube.
Regular upkeep can prevent your road bike from taking on too much damage as a result of this contamination.
Regular Upkeep
Soaking Brakes
Experts recommend soaking your disk brakes in a large solution of alcohol and then burning the rest of the residue off with fire (a blowtorch).
Most people don’t just have a blowtorch lying around, and if you do you probably aren’t looking to experiment on your bike’s brakes. However, this method is known and respected by many biking experts and has been used for generations to help clean pesky pads.
Measure Pad Life
Over time your brake pads will wear, but regularly checking how much padding is left can extend the life of your bike.
Regular maintenance includes measuring how much padding is left using a measurement gauge. You can find a cheap one on Amazon. If the pads ever appear glazed over in oil, it’s time to replace those bad boys.
Inspect Calipers
Before cleaning your brakes, you’ll need to give your calipers a good inspection.
The calipers usually have a rubber tip or cover that will need to be removed before removing the caliper. This rubber tip should be clean and oil-free. If not, you can remove residue with alcohol.
Next look at the retaining pin which is holding the calipers in place. Check that the pin hasn’t been contaminated as well; you can also hit it with a couple of sprays of alcohol.
Apply Brake Grease
If you ride down mountains often, then you’re likely using your brakes all the time. Such constant usage of your brakes can cause problems.
Every few months, you should habitually lubricate your caliper’s pistons.
Using a high-temperature degreaser, carefully lubricate just the pistons, pins, and back of the pads. Getting grease anywhere else will surely cause problems down the road– ha, get it?
Listen for Wear
Shaking and squeaking are symptoms of failing rotors, so if at any point you feel vibrations or howling during braking, it’s time to look at those pads and rotors.
Read What to Look For in a Road Bike?
Frequently Asked Questions
How long do disk brakes last on a bike?
Owners can expect to get up to 700 miles riding on resin disk brakes. Metallic disk brakes can see up to 1200 miles before needing replacement.
When should you service disk brake bikes?
Maintenance should be performed every six months or whenever the fluid becomes discolored, according to experts. Experts also recommend bleeding your brakes every six months to keep them stopping like new.
Can you use WD40 on disk brakes?
While degreasers of any kind should not be used on the brake pad, they can certainly be helpful in cleaning the internal metal parts of your bike. Be careful not to get WD40 on any other part of your brakes or rotors.
Summary
Even if you have no experience working on cars, finding and maintaining your disk brakes is a fairly simple process. Here are a few things to remember when owning a disk brake road bike:
- Never touch the rotor brakes– this transfers oil onto the rotors and makes the brakes less effective
- Avoid getting lube on the rotors– any kind of oil can contaminate your disk brakes
- Avoid squeezing the brake lever with the wheel off of the bike
- Inspect thickness of the brake pads regularly
- Use the correct solution specific to your bike to avoid further complications
Related Posts:
- How to Convert a Mountain Bike to a Road Bike
- Mountain Bike vs. Road Bike vs. Hybrid Bike
- How to Climb Rocks on a Mountain Bike
- Mountain Bike Or Road Bike: Which Is Better For Weight Loss?
- Can I Use Car Engine Oil In Bike?
- How to Cut a Bike Lock
- How to Clean and Lube Your Road Bike Chain

I am Michael, an avid rider and bike expert. I am here to provide, biking tips and expert advice on in-depth bike reviews covering features, capabilities, price range, and much more. Specially on electric bikes, mountain bikes, road bikes, etc. I will provide honest product reviews, along with expert advice on purchasing, training, and maintenance. Check out my complete profile.


