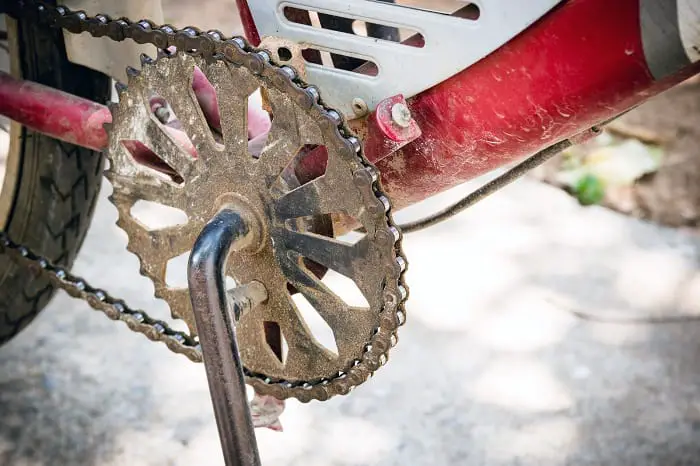
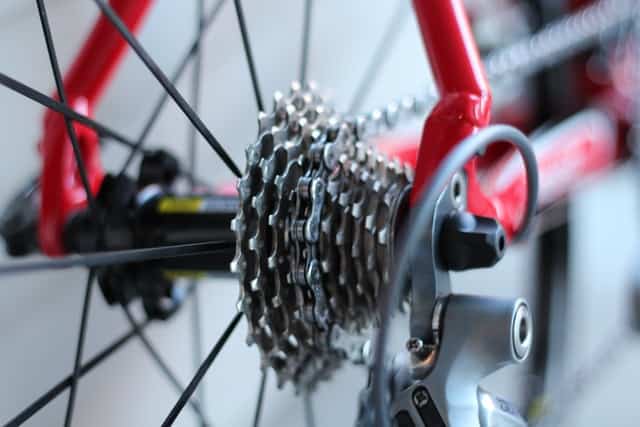
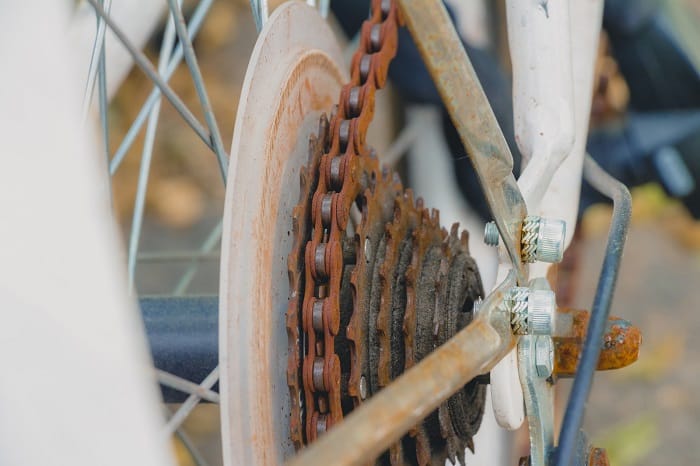
Whether you’re new to biking or are an avid biker you’ll eventually come across rusty bike chains sooner or later. It’s an inescapable chemical reaction that ensues when your motorbike’s chain comes in contact with water, mud, salt, and other rusting elements. Meticulous care of your two-wheeler can indeed prevent rust from forming, but there are times when even the most vigilant bike owners would find rusty chains.
If you look up “how to clean a rusty bike chain” on Google, you would come across several different methods and recommendations. Frankly, it can get quite overwhelming; some websites might recommend one method whereas others would outright disregard the entire idea and even claim that cleaning rust bike chains is probably the worst thing you can do. So, what should you do?
Fret not, we’ll help you get the answer. In this blog post, we will be highlighting some of the most common methods of cleaning rusty bike chains and also discuss whether buying a new chain is better than removing rust from old ones.
So, without any more delay, let’s get started!
Face-Off: Buying New Chain vs. Rust Removal
We believe it is better to first address this issue before we dig into how to clean a rusty bike chain.
Many people believe that cleaning a rusty bike chain is nothing more than a waste of effort and time; something that should only be done if somebody is on a cycling tour. Moreover, they also state that rust is a sign that the chain is old and/or useless, and hence must be replaced.
Nevertheless, we beg to differ.
The decision to whether clean a rusty bike chain or buy a new one depends entirely on the state of the bike chain itself. For instance, suppose you purchased a new bike a little while ago and stored it in the garage.
After some time, you pull it out and see that it’s still as good as new, except its chain is rusted. So, should you directly throw away the chain?
No, you should not. Both the bike and the chain are in great condition, and the only reason why the chain has rusted is due to the way the bike was stored. Plus, your failure to regularly oil the chain.
Therefore, discarding a bike chain like that might not be the best decision unless cleaning it hasn’t provided desired results or hasn’t helped much.
Read How To Clean a Bike Chain with Household Products
Buying New Chain vs. Rust Removal
| Choose Rust Removal When: | Buy New Chain When: |
| There’s surface rust | The chain is severely rusted |
| You have time | A severely deteriorated chain is affecting other parts of the bike |
| You are willing to put in the effort to clean the rust | You do not have time to remove rust |
| You are seeking an economical option |
How to Clean A Rusty Bike Chain?
Now that we have solved the “Buying New Chain vs. Rust Removal” debate, let us move to the actual topic at hand: how to clean a rusty bike chain.

If your bike is suffering from surface rust, WD-40 or lime juice are excellent ways of restoring a bike chain to rust-free and glistening conditions. Please note that for cleaning the chain, you will first have to detach it from the bike and once all the hard work is done, you will need to reattach and lubricate it before taking your bike for a spin.
So, without any more delays, let us begin:
Read How much air pressure in bike tires
CHAIN INSPECTION AND DETACHMENT
Before we move onto the cleaning bit, it is crucial to understand that the bike chain must first be inspected and detached. Here’s how you can do that:
Step 1: Firmly secure bike on a rack or in an upside-down position
The first step is to turn your bike upside down or you can even use a bike rack to securely position it. It is improbable that a kickstand would remain stable or keep the bike upright while you are removing rust from the chain.
Therefore, it is best to turn the bike upside down or hang it on a rack to ensure it rests firmly on the handlebars and seat.
Additionally, turning your bike upside down or dangling it on a rack makes it easier for you to access the chain as you work on it.
However, if you have a flashy bike, consider laying a drop cloth in between the ground and the bike. Doing this will make sure that you do not scratch the bike’s paint job.
Step 2: Assess the chain’s condition
Once you have the bike all set up in a firm and secure position, the next step is to closely evaluate the bike chain’s condition. If you notice any blots in the metal, warping, or similar deterioration, both you and the bike will be better off with a new chain.
Crustiness, surface rust, and buildup can be effectively removed so that your chain works like new; however, severe deterioration cannot be undone.
To ensure optimal bike chain performance and long life, it is highly recommended to clean the bike chain once every week or once every two hundred miles.
Keep in mind that keeping the chains clean and lubed will maintain and preserve the chain’s condition and help you identify damaged links sooner.
Tip: Replace bad links right away to avoid more damage.
Step 3: Find the master link (if applicable)
Not many people are aware, but nowadays bike chains come equipped with a master link. A master link makes it easier for you to remove the chain from the bike.
Search for links that have special slot/pin connections, where the pin of a link fits securely into a slot of the adjoining link.
Moreover, keep in mind that many bikes don’t have a master link. Therefore, if you are unable to find one on your bike, don’t be surprised.
Step #4: Take an image of the drivetrain for reassembly
Remember, it is crucial that you reassemble the bike chain in the drivetrain accurately.
Hence, to make reassembly easier, we recommend you take some pictures of the chain from various angles, as well as some pictures of the sprockets and the gears before removing the chain.
If you are unable to reinstall the bike chain into the drivetrain properly, know that serious harm can be done to you or your bike. Plus, in many cases, the bike would not work at all.

Read How to Clean an Electric Bike
SURFACE RUST CLEANING PROCESS
Step 1: Remove bike chain especially if there’s heavy surface rest
Before you start cleaning, ensure you’ve detached the chain from the bike, especially if it has heavy rust on the surface. If your bike chain has a master link, slide the pin out of the slot in which it is fastened with your hands.
Once it disengages, pull the chain free. If there is no master link, you will have to jolt a link of one of the gear spikes.
Once the first link is loosened, the rest will easily come off. All you have got to do next is to jerk the chain out of the drivetrain.
Step 2: Wipe the chain with a wet, degreased cloth
Once the chain is removed from the drivetrain, take a piece of cloth and dampen it with some degreaser. Thoroughly pull through and rub the chain with the degreased piece of cloth in order to remove any grease and/or buildup.
Please note that severe or excessive buildup may require vigorous buffing or scrubbing with a degreaser rag before it becomes free.
Step 3: Soak the chain in degreaser (especially, if there is heavy buildup and grime)
For heavy buildup and grime, you might have to immerse the chain in a degreaser. For this, take an empty plastic bottle and fill it up with a degreaser. Place the chain in it and let it soak there for at least twenty minutes.
Once twenty minutes have passed, thoroughly rinse the chain in another bottle filled with clean, hot water.
Note: The majority of degreasers are quite harsh on the skin. Therefore, be cautious and wear latex gloves.
Step 4: Scrub away light rust with lime juice and steel wool
Before you start, there is something you should know about is the de-rusting method: it can extremely rough on the hands.
Therefore, it is best to wear some latex gloves before you get started. Once you are all set and ready for the hard work, thoroughly wet a piece of steel wool with lime juice.
Next, scrub the light rusted surface areas with the steel wool to soften and eliminate rust. Once done, wipe the surface clean with a fresh piece of cloth or paper towel.
Additionally, keep in mind that scrubbed and neutralized rust from the chains might gunk up the steel wool. In case you experience the same, simply wash it with hot water, reapply lime juice, and continue rubbing.
Step 5: Wash away lime juice after removing rust
Once you are done scrubbing away the rust with the lime juice, the next step is to wash the chain in soapy water. Not many people realize this, but lime juice involves a wholesome amount of sugar.
Hence, you would not want it to dry on the chain, or else it would end up being sticky. To prevent any sugary mess, thoroughly rinse the bike chain in hot or warm water mixed with a tad bit of dish soap.
Step 6: Scrub away severe/tough trust with WD-40
Light rust can easily be scrubbed away with lime juice, however, for tough rust, you would need something stronger, like WD-40.
All you have to do is spray WD-40 directly onto the rusted chain area in sections. Next, let it sit there for few moments so that the solution saturates well.
After a few minutes, briskly scrub away tough rust with the help of a wire brush. When you notice the bike chain is rust-free, wipe it clean with a fresh piece of cloth and remove any unwanted residue.
Once you get the desired level of cleanliness, the next step is to simply reinsert and lubricate the bike chain.
Read Can Mountain Bikes Get Wet?
REINSERTING THE CHAIN

Step 1: Use the images to reinsert the chain in the drivetrain
Once the chain is squeaky clean and rust-free, it is time to reinsert it to the drivetrain. Bear in mind that this process depends on the type of bike and chain you own. The images you took earlier of the drivetrain should come in handy in this step.
Line the chain’s one end through the drivetrain to ensure it meets its other end at the bottom or top center between the wheels. In general, chain links fit onto the gear points easily and work effortlessly through all drivetrain components. In case you feel any type of resistance, you have likely attached the chain incorrectly.
Step 2: Reattach the master link
To do this, you can use your fingers to bring the chain’s ends together at the middle point amid the wheels. Connect the pin end-link with the slot of the opposite end-link. When reattached correctly, the master link would align seamlessly with other links. In case it is not, it could lead to chain warping.
Step 3: Check the chain in motion
With the master link fastened, you should finally be ready to give your wheels a good spin. If all are done well, the chain would pass smoothly across the drivetrain.
In case you hear some irregular noises, such as grinding, groaning, or scraping, or unusual resistance from the bike chain, you probably would have reinserted the chain improperly.
However, please note that you do not always have to reinstall the chain from scratch. Many times, trivial errors can be amended easily with some twitches from your fingers.
Step 4: Lubricate the bike chain
Keep in mind that lubricating your bike chain with a high-quality lube would protect it from further rusting and grime buildup. Therefore, it is crucial that you lubricate it every now and then.
For this step, squeeze out a steady, thin stream of lube onto the chain while spinning the bike’s wheel. Do this only once and you would have a lubed chain and bike ready for a spin!
You may like the following biking articles:
- Do Electric Bikes Save You Money?
- How to Remove Rust from Bikes
- How To Clean a Mountain Bike
- What to eat before a bike ride
- How to get Bike Grease out of Clothes
- How to clean and put a bike chain
- When to Change Road Bike Tires?
Conclusion
It is important to remember that rusting of the chains is a part of the whole biking experience – it’ll occur sooner or later no matter how careful you are. But you can surely keep the rust and grime at bay by degreasing and cleaning the chain properly and regularly. Another thing you should remember is lubrication. If you do not lube the bike chain after cleaning, know that it would not hold on. You must always lube after you are done cleaning!

I am Michael, an avid rider and bike expert. I am here to provide, biking tips and expert advice on in-depth bike reviews covering features, capabilities, price range, and much more. Specially on electric bikes, mountain bikes, road bikes, etc. I will provide honest product reviews, along with expert advice on purchasing, training, and maintenance. Check out my complete profile.
